Category Archives: No-Bake Bakes

Boozy Chocolate and Hazelnut Pie

Boozy Chocolate and Hazelnut Pie

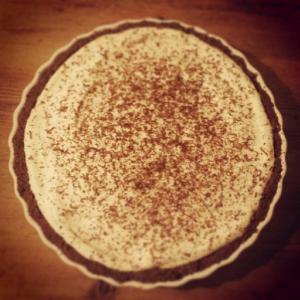
Boozy Chocolate and Hazelnut Pie; plenty of festive spirit in this one!

This week was the December meeting of the Bake Club I’m part of and the theme was Boozy Bakes – helpful for getting us all in the festive spirit (sorry, I’m a bit of a pun fan)! Though I rarely drink, I have a fairly extensive array of liqueurs that mostly get used This week was the December meeting of the Bake Club I’m part of. Our theme was for baking. When deciding what to make I recalled making grasshopper pie a while back and thinking there were endless possibilities for other flavour combinations; after a little deliberation I settled on hazelnut and chocolate.

This isn’t a pie in the classic sense of the word, certainly it’s more US inspired than GB, but calling it a tart didn’t seem right somehow. Regardless of the name, it’s delicious; the marshmallow cream gives the filling an incredible texture and the liqueurs make it a distinctly grown-up dessert. My top tip when making this is to melt the marshmallows slowly – too much heat can mean the gelatine from the marshmallows doesn’t work its magic and the filling doesn’t set properly. Other than that, this is super easy to make so give it a go!

Boozy Chocolate and Hazelnut Pie

For the base:

  • 300g bourbon biscuits
  • 50g dark chocolate
  • 50g butter, softened

Chuck all the ingredients in a food processor and whizz them up until they begin to clump. Tip into a tart tin and press down with the back of a spoon, smoothing into the edges and up the sides, trying to make it as even as possible. Place in the fridge and chill until your filling is ready.

For the filling:

  • 125ml full-fat milk
  • 150g mini marshmallows
  • 60ml (4 tbsp) creme de cacao blanc (or other chocolate liqueur)
  • 60ml (4 tbsp hazelnut liqueur (Frangelico or similar)
  • 375ml double cream
  • a few grams dark chocolate to decorate (optional)

Put the milk and marshmallows in a saucepan and melt slowly on a low heat – the milk should never boil, just begin to foam, and you’ll be able to hear the marshmallows foaming as they melt. I can’t stress enough that you should take your time with this stage; keep taking the milk off the heat and stirring the marshmallows to get them to melt without letting the temperature get too high. Once the marshmallows are completely melted, remove from the heat and stir in the liqueurs. Transfer the liquid to a heat proof bowl and leave to cool.

Once cooled, whisk the cream in a large bowl until it’s getting to soft-peak stage. Add the boozy marshmallow mixture and continue to whisk until smooth and thickened – it should be the texture of very soft (Mr Whippy) ice cream. Pour into the biscuit base and smooth out to the edges. Finely grate a little dark chocolate over the top and chill in the fridge for a few hours or overnight before serving.
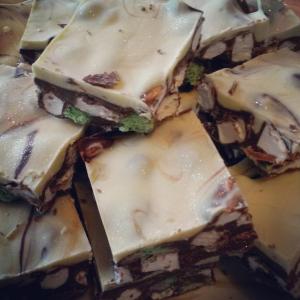
Snow-topped Minty Rocky Road

Snow-topped Minty Rocky Road

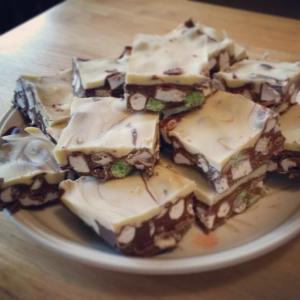
Snow-topped Minty Rocky Road – easy to make and very easy to enjoy eating!

I’m mostly getting into the Christmas spirit through the feasting aspect (always my favourite part of any festivities). I think these easy treats would make lovely little gifts, prettily bagged-up when visiting people over the Christmas season. A word of warning; go easy with the peppermint essence or flavouring – a few drops should be plenty, taste as you go and you can always add more, but if you’re heavy-handed it can get a little toothpasty tasting!

Snow-topped Minty Rocky Road

Ingredients:

  • 450g milk or plain chocolate (or a combination of the two)
  • 70g butter
  • small pinch salt
  • 3×4 finger mint KitKat biscuits (or other mint chocolate biscuits of your choice)
  • 150g mini marshmallows
  • 1 large packet mint Aero balls (or get some of the bars and chop them into chunks if you can’t find the balls)
  • 300g white chocolate
  • a few drops peppermint essence or flavouring

Grease and line a high-sided baking tray (approx 22x25cm) with greaseproof paper. In a heat proof bowl over a pan of simmering water (making sure the bowl doesn’t touch the water), melt the milk/plain chocolate, 50g of the butter and add the salt, stirring occasionally until smooth. Turn off the heat and leave for a few minutes to cool a little. Chop the mint biscuits into chunks and add them to the chocolate mix, along with the marshmallows and mint chocolate Aero balls, stirring to ensure everything gets coated; be as brief as possible to avoid the Aero balls melting too much. Scrape into the prepared tin and smooth into the corners so you have an even layer, but still lots of lumps and bumps – this is Rocky Road after all! Leave to cool in the fridge for about half an hour or longer so the top is set.

Following the same method of melting in a bowl over simmering water, melt the white chocolate along with the remaining 20g butter, stirring occasionally until smooth. Remove from the heat and add a couple of drops of mint essence, stir it through and taste a little to see if you think it’s minty enough. Add more, a drop or two at a time until it’s to your taste. Allow to cool slightly before taking the tin from the fridge and pouring the white chocolate on top, trying to coat as much of the surface as possible whilst pouring. Tilt the tin or use a spatula to carefully spread the white chocolate evenly, trying to get as little of the brown chocolate showing through on top. Return to the fridge for a few hours to set completely.

When ready to serve or bag up as presents, remove from the fridge. If you have any white edible glitter, give the top of your snowy rocky road a frosty dusting. Remove from the tin and peel away from the greaseproof paper. Cut into squares and get stuck in.

Christmassy Snow-topped Minty Rocky Road

Double chocolate and minty goodness

Easy Salted Caramel Ice Cream

Easy Salted Caramel Ice Cream

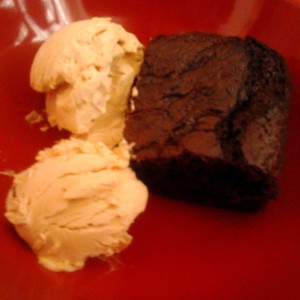
Easy Salted Caramel Ice Cream – goes brilliantly with brownies

There may be some very random recipes coming up in the next month – I’m moving and trying to use up stuff in my kitchen cupboards so I don’t have to take it with me. I made this in order to use a tin of caramel and a tub of cream (I bought it to make something else but realised I needed a longer expiry date). It’s ridiculously easy, requires just three ingredients and doesn’t need any fancy equipment. Add the salt in small increments, tasting as you go, but bear in mind that the flavours will be somewhat muted once frozen so be bold. Also, whilst a tin of Carnation Caramel (as I used) is 397g, there’s no need to be quite so precise with your measurements if weighing out from a larger jar.

Easy Salted Caramel Ice Cream

Ingredients:

  • 500ml double cream
  • 397g ready made caramel/dulce de leche
  • 1-2 tsp sea salt (to taste)

In  a large bowl, whip the cream until it’s thick and forms soft peaks – it should cling to the whisk but drop off easily when tapped on the side of the bowl. Stir the caramel to make it smooth, then add to the cream and fold in with a large spoon or spatula, trying to get rid of any big lumps ( a few small deposits of pure caramel through your ice cream won’t hurt!).

Sprinkle a little of the salt over the caramel cream – start with about half a teaspoon – and mix well. Try a bit to see if it’s to your taste, adding more salt a little at a time until it’s how you want it. Pour into a freezer-proof box with a lid and freeze for at least 6 hours, or preferably overnight. No need to keep taking it out and churning, it will set soft enough to be able to scoop just a few minutes after it’s taken out of the freezer. Delicious on it’s own, in a cone, or alongside warm apple pie or brownies!

Easy Mint Choc Chip Ice Cream

Easy Mint Choc Chip Ice Cream

Cool and refreshing, easy mint choc chip ice cream

Phew – it’s hot out there! Perfect weather for ice cream, and the good news is you don’t need an ice cream machine or to spend ages making custard to be able to knock together this cool, fresh little number. No churning or fancy gadgets required either; it’s dead easy and has very few ingredients. If you don’t have Creme de Menthe you could add a few drops of peppermint essence to amp up the tingly, minty flavour (a word of warning though; do stick to just a few drops as too much will leave you with ice cream reminiscent of toothpaste). I’ve used milk chocolate in this version, but dark or white chocolate would do just as well – pick your favourite and give it a go.

Easy Mint Choc Chip Ice Cream

Ingredients:

  • Small bunch mint leaves (about 15g, just leaves, no stalks)
  • 300ml double cream
  • 175g condensed milk
  • 2 tbsp Creme de Menthe liqueur
  • 100g milk choc chips or chocolate chopped into small pieces

Finely chop the mint leaves; or pulverise in a pestle and mortar; or whizz up in a blender – ultimately you want very tiny pieces of mint, however you achieve it. Add the mint to a bowl with the cream, condensed milk and liqueur and whisk until light and fluffy. Add the chocolate and stir through or give another little whisk. Put it all in a tupperware or similar lidded, plastic box that will fit in your freezer (it makes about a pint of ice cream). Freeze for 6 hours or overnight. Take it out of the freezer a couple of minutes before you want to serve. Delight in the chilled refreshment and natural mint flavour!

Lime and Ginger Cheesecake

Lime and Ginger Cheesecake

Fresh and cool Lime and Ginger Cheesecake

Well the weather is doing what it’s supposed to, which means it’s barbeque season; I went to a pretty awesome one yesterday. Obviously at a barbeque the meat is king, but I still can’t help myself taking along something sweet for dessert. I decided it should be something with fresh, bright flavours that would wake up the taste-buds after the carnivorous overload (not that I’m complaining about eating ALL the meat!) so I settled on this zingy lime and ginger cheesecake. The sharp lime cuts through the richness of the cream and cream cheese, whilst the crunch of the ginger biscuit base compliments the cool, smooth topping.

Lime and Ginger Cheesecake

For the base:

  • 250g ginger nut biscuits
  • 100g butter, melted

Line the base of a 9″ spring form pan with greaseproof paper. Crush the biscuits, either by whizzing them up in a food processor or (the fun way!) by putting them in a clean sandwich bag and bashing them to bits with a rolling pin or other heavy kitchen implement; you want a fine breadcrumb texture when you’re done. Transfer to a bowl and add the melted butter, mixing well. Tip in to the prepared pan and press down with a spatula or back of a spoon until you have an even layer, slightly higher at the edges than the centre. Place in the fridge to chill while you get on with the rest.

For the topping:

  • 300ml double cream
  • 300g full fat cream cheese
  • 150g icing sugar, sifted
  • 2 limes

In a large bowl, whisk the cream to soft peaks – I prefer to do this by hand as its very easy to over beat cream with an electric whisk and you almost end up with butter if you go too far. Add the cream cheese and mix into the cream with a spatula until well incorporated. Finely grate the zest from the limes and reserve about a teaspoon which you’ll use to scatter over the top of the finished cheesecake. Add the rest of the zest and the juice of the limes to the cream and cheese, add the icing sugar and mix it all in well.  You may need to use the whisk again just to bring back to soft peak stage.

Take the base out of the fridge and pour the topping into the tin, smoothing it down with a spatula or palatte knife. Scatter the remaining lime zest over the top and refrigerate until you’re ready to serve, and for at least 2 hours. When it’s time for dessert, release from the spring form tin, using a palatte knife to run round the edge if necessary. Carefully loosen from the base and transfer to a serving plate.

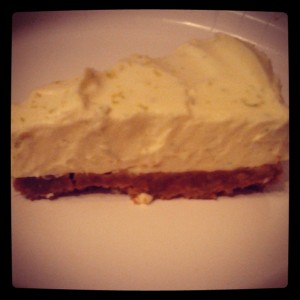
Lime and Ginger Cheesecake slice

Crunchy ginger biscuit base topped with creamy, citrusy lime cheesecake

American Pancakes with Apple

American Style Pancakes with Apple

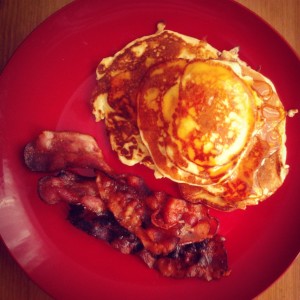
American Style Pancakes with Apple, served with Bacon and Maple Syrup

Some time last year I had a vivid dream about eating American style pancakes that had apple in, served with bacon. I had to make the dream a reality and fortunately it turned out they were lovely. These would make a great breakfast or brunch dish; serve with apple compote, berries and Greek yoghurt or (if you have any sense) bacon and maple syrup.

American Style Apple Pancakes

Ingredients:

  • 135g plain flour
  • 1 tsp baking powder
  • half tsp salt
  • 2 tbsp caster sugar
  • 1 egg
  • 130ml milk
  • 2 tbsp melted butter, slightly cooled
  • 1 eating apple, skin on, grated
  • a little oil for frying

Put all the dry ingredients in a bowl and mix together. In another bowl or a jug mix the milk and egg together until well combined, then add the melted butter and mix again. Pour this liquid over the flour, beating in with a fork until you get a smooth batter. Add the grated apple and give a stir to combine. Let this mixture stand for a couple of minutes before you begin frying.

Heat the oil in a large frying pan – a medium heat is best so that the pancakes cook through without getting too browned. Drop the heaped tablespoons of the batter and cook for about a minute until set then carefully flip over to cook the other side of the pancake. Serve these golden beauties while still warm, with your choice of topping.

Easy Chocolate Fudge

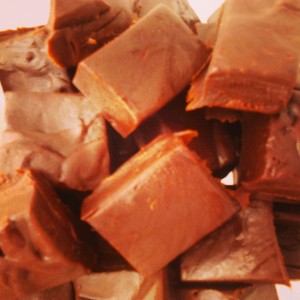
Chocolate Fudge

Easy Chocolate Fudge

This isn’t the proper stuff that takes ages to make and requires the use of a sugar thermometer, this is dead easy and very quick (apart from the time it takes to cool). You can add other flavours, like a splash of liqueur, some vanilla extract or, as I did, some instant coffee.

Chocolate Fudge

Ingredients:

  • 250g condensed milk
  • 200g chocolate (I used a mix of plain and milk, but use whatever you want)
  • 25g butter
  • Pinch salt

Grease and line an 8″ cake tin (I used a round tin, but if you have a square or rectangular one you’ll get neat squares of fudge when you cut it). Put everything in a saucepan and warm over a moderate heat, stirring all the time, until everything is combined and looks glossy and shiny. Remove from the heat and pour into the prepared tin. Leave to cool for 20 minutes or so before transferring to the fridge to set properly (about 2 hours). Turn out of the tin and cut into bite size portions!

Classic Rocky Road

Home made Rocky Road

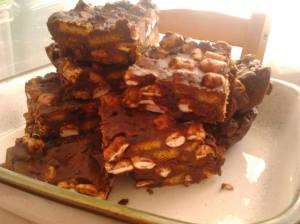
Rocky Road – delicious!

There are tons of versions of this and you can customise it to add or leave out whatever ingredients you fancy (apart from maybe the chocolate!) so that it’s got all your favourite tea-time treats in. Generally it’s always a mix of chocolate, broken biscuits and marshmallows – the lumpy appearance when everything is combined giving it the famous name.

Classic Rocky Road

Ingredients:

  • 300g chocolate (I prefer a mix of dark and milk, but either of those on their own would be just fine)
  • 125g butter
  • 2 tbsps golden syrup
  • 200g digestive biscuits
  • 75g raisins
  • 100g mini marshmallows

Line a 20cm square pan with greaseproof paper (it doesn’t matter if your pan is a little bigger or smaller). Melt the chocolate, butter and syrup together in bowl over simmering water; it’s important not to melt chocolate too quickly so stick to a low heat.

Meanwhile, break your biscuits into pieces into another bowl and add the raisins. Once the chocolate and butter mixture is melted and glossy, pour it over the biscuits and raisins. Use a spatula to scrape all the chocolate from the melting bowl into the biscuit bowl, then stir everything together until everything is coated. Lastly add the marshmallows – this way they won’t melt too much in the warm chocolate. Tip the chocolaty mixture into the prepared tin and use your spatula to press everything firmly into the corners, levelling off the mix; you’ll be left with a lovely ‘rocky’ surface. Chill in the fridge until set, a couple of hours should do it if you can’t wait any longer. Remove from the tin, peel away the greaseproof and chop into whatever size pieces you desire!

White Chocolate and Marshmallow Rice Krispie Treats

Rice Krispie Treats

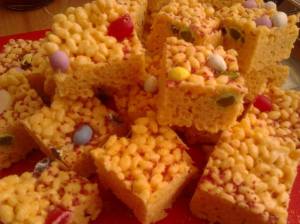
Rice Krispie Treats with jelly beans and chocolate mini eggs

A big part of the satisfaction I get from baking is sharing it with other people and seeing how much they enjoy it. This is rarely more evident than when you give sweet treats to kids; they never say they like stuff when they don’t and their unabashed enthusiasm for naughty-but-nice bakes is incredibly rewarding. I certainly don’t recommend plying kids with sugary snacks on a daily basis, but as somebody who generally only sees my friends’ kids every now and again, I don’t see any harm in bribing them into liking me instantly with a few lovingly-made goodies. I’m heading to see a friend and her twin boys this evening, so I made a batch of rice krispie treats to take with me.

White Chocolate and Marshmallow Rice Krispie Treats

Ingredients: 

  • 100g butter
  • 175g marshmallows
  • 100g white chocolate, broken into chunks (cheap stuff is best, I used supermarket own brand)
  • 150g rice krispies
  • A couple of handfuls of sweets of your choosing
  • Sprinkles/edible glitter to decorate if desired

Grease and line the base of a loose-bottomed 20cm square tin or a spring form cake tin (the important bit being that the bottom of the tin can be separated to make it easy to get them out of the tin). Melt the butter and marshmallows slowly in a bowl set over a saucepan of simmering water, stirring all the time. Try and use a large-ish bowl if you have one, the important thing being that the bowl doesn’t touch the water in the pan. Once the butter and marshmallows are melted, add the chocolate and continue to stir until everything is melted and well mixed. If your bowl is big enough, add the rice krispies and stir through with a spatula to mix together. You’ll find the mix gets harder to stir very quickly as it cools so it’s a good idea to keep it over the hot water. If your bowl with the melted mixture in isn’t big enough for the rice krispies too you’ll need to work fast to mix them together in a bigger bowl that isn’t over the hot water. Throw in your chosen sweets (I used jelly beans and mini chocolate eggs but feel free to use whatever you fancy) and tip out into your prepared tin. Press down firmly with the back of the spatula, making sure you get it into the corners. If you’re decorating with sprinkles (I used strawberry flavoured sprinkles) or edible glitter, scatter this over now and give it another press all over with the spatula to help it set it. Refrigerate until set (an hour or two) before removing from the tin and cutting into kiddy-size squares.