Tag Archives: cake

Happy blog birthday to me!

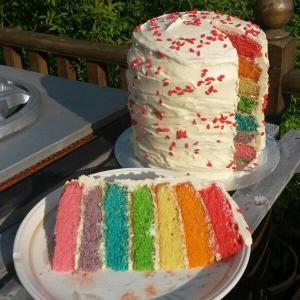
Rainbow cake to celebrate my blog's first birthday

Rainbow Cake

Not a recipe this one. Just a bit of a thank you, really. I’ve been writing this blog for a year now, and it makes me really happy. As much as anything it’s a great way for me to keep my recipes, but I do enjoy sharing my baking and this way I get to share it with all of you who read it.

Along the way, even before I started, there’ve been some people who’ve been super supportive and encouraging. I want to say a little thank you to a few. They’re all lovely folk, and you could do worse than follow them (on Twitter) or check out their blogs.

Firstly, The Ginger Bread Lad, one of my favourite baking bloggers, who was always so nice about my baking on Twitter and suggested I give blogging a go. Definitely one to watch, this one – I expect big things from him in the future. Have a look at his recipes here.

Then there’s Alice. Lovely Alice. Encouraging me to blog doesn’t really cover it. Nagged. Pestered. Bullied. Even came round my house and helped me get it working properly and gave me a 101 in WordPress. If you’re lucky enough to know Alice (and if you live in Brighton, I’d be surprised if you don’t, networking queen that she is), then her generosity of spirit knows no bounds. She’s also a good excuse for me to come up with more gluten-free baking. Check out her Gluten-Free Dining Guide.

The delightful Arusha Elworthy lent her magnificent skills by creating my logo. I particularly love my little pink-haired, leopard-aproned baker (me in cartoon form, even though my hair is no longer pink). Thank you for making me look so adorable!

My most unusual recipe to date has to be my Gluten-Free Bacon and Peanut Butter Brownies, created for the Pork Princess herself, Nicole ‘Snafflepuss’ Healing. She was even kind enough to re-blog my recipe on her blog, where you can find plenty of good stuff to read about all sorts of things. She’s also a marvellous yoga buddy.

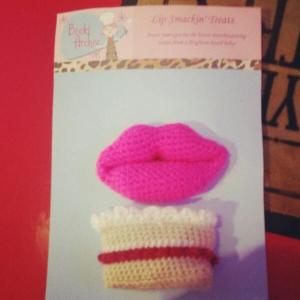
Speaking of buddies, Hannah is my good Bake Club buddy. And she’s a dab hand with the old crochet hook, crafty mare, and made me the most amazing birthday present of some beautiful pink lips and a cake, which I proudly wear daily and get lots of compliments on. That’s them in the picture below. See how clever she is?! Oh, and she guest-blogged some tasty little biscuits.

Beautiful crochet brooches, handmade for my birthday by Hannah.

Birthday lips and cake

Endless encouragement and offers of help come from my favourite glamour-nerd on the street, Amy Blackburn. I’ve known and loved her long time, and I’m inspired and delighted by her success setting up her own business. If you like geeky, comic book stuff and super cute clothes then Geek La Chic is the place for you.

A few friends in Twitter-land, who I hope one day to meet for real, also deserve mentions for all their retweets, confidence boosting and even trying out my recipes. Thank you Faye, Dodie, Mike, Jacquie (perhaps better known as Bite Me Brighton) and Julie – you’re all awesome and deserve a huge slice of cake.

Whilst there’s no recipe this time, I did make myself a big old blog birthday cake. I would have blogged it, but honestly, though it looks pretty good in the picture there were a few disasters with this along the way. You’re bound to find a decent recipe for rainbow cake online, and I know that Holiday Baker Man is kindly willing to share his expertise if you are brave enough to give one of these mammoth cakes a go. Still, for all its issues, it didn’t half look impressive when I cut a slice!

There are plenty more people I probably should have thanked (ooh it’s all gone a bit awards ceremony speech), but I don’t want to run the risk of boring anyone so much they never come back to look at my recipes. So to all of you who’ve ever read my little blog – thank you!
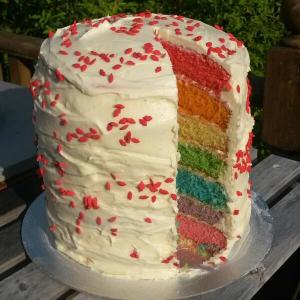
Seven layers of colourful cake

Rainbow birthday cake


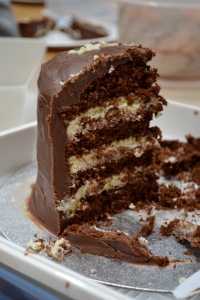
Totally Chocolaty Birthday Cake

Totally Chocolaty Birthday Cake

Four layers of chocolate sponge, sandwiched with white chocolate buttercream and smothered in chocolate ganache

Judging by how many birthday cakes I’ve been asked to make in the last few weeks, spring really does get everyone’s sap rising! Anyway, the lovely Natasha Bailie (parental types should check out her blog, the milkstand) asked me to make a cake in honour of her baby boy’s first birthday. The babies attending Max’s birthday party will be having something a little kinder to young tummies and teeth, but the grown ups are getting the big-fat-birthday-cake experience with this totally chocolaty bad boy.

The instructions for making the ganache are given last as covering the cake with this divine mixture is the last stage of the cake. However, as the ganache needs to cool before using, it’s actually a good idea to make it first, or around the same time as you make the sponge.

Totally Chocolaty Birthday Cake

For the cake:

  • 225g butter, softened
  • 225g caster sugar
  • 4 eggs
  • 50g cocoa, sifted
  • 175g self raising flour
  • half tsp baking powder
  • 2 tsp vanilla extract
  • 1 tbsp golden syrup
  • 1 – 2 tbsp milk

Heat the oven to 175C and grease and line 2 8″ cake tins with greaseproof paper. In a large bowl, cream together the butter and sugar until light and fluffy. Beat in two of the eggs until well mixed and smooth. Add the cocoa and a bit of the flour and mix again, scraping down the sides of the bowl to make sure everything is being well incorporated. Beat in the third and fourth egg, then the remaining flour and baking powder, then the vanilla and syrup, and finally slowly add the milk, mixing until you get a soft batter that drops easily off a spoon. Divide the mixture as evenly as possible between the two prepared tins, flattening it out with a spatula. Bake for 25 – 30 minutes – the cake is done when the middle springs back when lightly pressed with your finger, a skewer comes out clean and it’s beginning to come away from the sides of the tin. Remove from the oven and cool on a wire rack. Once completely cool, remove the greaseproof paper and cut in half with a large, serrated (bread) knife. You now have your four layers ready for filling and covering!

For the white chocolate buttercream:

  • 200g butter, softened
  • 400g icing sugar, sifted
  • 1 tsp vanilla extract
  • 200g white chocolate

If you have a free standing mixer or electric hand whisk, I’d suggest using it for this.

In a large bowl, beat together the butter, sugar and vanilla (start slowly to try and avoid covering your kitchen in icing sugar). Beat for longer than you think you need to – this way you’ll get a lovely soft, lightly whipped textured buttercream. Melt the white chocolate (either in a bowl set over a pan of simmering water, or very carefully in a microwave in bursts of 20 seconds, stirring in between). Allow the chocolate to cool a little before adding to the buttercream and give it a really good beating to make sure it’s well mixed.

Place one of your layers of cake on a cake board or whatever serving plate you’re planning on using. Dollop about a third of the buttercream on and use a palatte knife to spread it out to the edges in an even layer. Add another layer of cake, taking a little time to make sure it’s on straight and pressing down lightly to secure it. Repeat the process with the buttercream and cake layers until you have all four layers of cake sandwiched together with three generous layers of buttercream.

For the chocolate ganache:

  • 300ml double cream
  • 500g milk chocolate, chopped
  • 1 tsp vanilla extract
  • small pinch salt

Warm the cream in a medium sized saucepan until just under boiling point, a few small bubbles at the edge of the pan are fine. Turn off the heat. Add the chopped chocolate and stir into the cream with a spatula until completely smooth and no lumps of chocolate remain. Add the vanilla and a very small amount of salt (sea salt for preference over table salt) and mix well. Allow to cool completely, stirring occasionally. The mixture will become thick, but spreadable.

Dollop most of the mixture on the top of the cake, then use a spatula or large palatte knife to smooth it out to the edges and down over the sides (this video will show you how far better than I can explain it!). If you want a really shiny finish, dip your metal palatte knife in hot water, dry it on paper towel and use the hot knife to smooth the surface of the ganache.  Decorate however you wish – I melted a little white chocolate and piped the birthday boy’s name and age, but be as creative and flamboyant as you feel befits whoever the cake is for!

Max's Chocolate Birthday Cake

Chocolate makes the perfect birthday cake, whatever age!


I have plenty of cake recipes that would all make wonderful birthday cake, click here to check them out.

Toblerone Birthday Cake

Toblerone Birthday Cake

Toblerone Birthday Cake for a surprise party

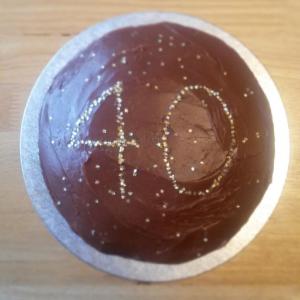
I was asked to make a birthday cake this week, and given the brief “a nice sponge or chocolate cake, with 40 iced on top”. I’m no great artist with a piping bag so I asked what the birthday boy’s favourite sweets are, thinking I might be able to make a 40 out of them; it turned out Toblerone is his favourite, which inspired me to make this cheeky little number. I opted for a vanilla sponge as I felt chocolate sponge, buttercream and ganache may have been excessively rich; by all means if you want to go for a totally chocolate experience then you could use this cake recipe in place of the vanilla sponge.

Toblerone Cake

For the cake:

  • 225g butter, softened
  • 225g caster sugar
  • 2 tsp vanilla extract
  • 4 eggs
  • 225g self raising flour
  • 2 tsp baking powder
  • 2 tbsp milk

Heat the oven to 175C and grease and line two 8″ cake tins with greaseproof paper. In a large bowl, cream together the butter and sugar until light and fluffy. Add the vanilla and two of the eggs and beat again until well combined. Add about half the flour and mix. Follow with the remaining two eggs, mixing again, then the last of the flour and baking powder mixing until everything is well combined and smooth, scraping down the sides of the bowl if necessary. Lastly add mix in the milk so the cake batter is a soft, dropping consistency. Divide the mixture as evenly as possible between the two cake tins, smoothing into the edges with a spatula or back of a spoon. Bake in the oven for 20-25 minutes. The cakes are done when golden, a skewer inserted comes out clean, or they spring back when lightly pressed with a finger tip. Remove from the oven and leave to cool on a wire rack.

For the Toblerone ganache:

  • 300g Toblerone (or similar, non-branded chocolate bar)
  • 75g milk chocolate
  • 300ml double cream
  • small pinch salt

Chop the Toblerone and other chocolate into small pieces. Heat the cream over a medium heat in a smallish saucepan. Once the cream is just under the boil (beginning to bubble very slightly at the edges) turn the heat off and add the all the chopped chocolate and the small pinch of salt, stirring until melted and the mixture is smooth. You’ll see little white flecks, which are the nougat, but if you occasionally stir it as the mixture cools these will melt too. Leave to cool completely (this will take a few hours).

For the Toblerone buttercream:

  • 125g butter, softened
  • 250g icing sugar, sifted
  • 1tsp vanilla extract
  • 100g Toblerone

If you have a food processor, use this to whizz up the Toblerone so it’s small crumbs; otherwise, chop as finely as possible.

In a bowl, cream together the butter and icing sugar – if you’ve got an electric hand whisk or stand mixer use it for this – beat the mixture for longer than you think you need to and you’ll get a lovely, fluffy soft buttercream. Add the vanilla and chopped Toblerone and give it all a really good mix.

To assemble the cake, place the flattest cake on a serving plate or cake board. Smother with the buttercream, using a spatula or palette knife to get it as evenly spread and as flat as possible. Place the top layer of sponge on and gently but firmly press down to secure it in place. Use a spatula to dollop the ganache on top of the cake. Use a palette knife to push the ganache to the edges of the cake then smooth it down over the sides, turning the cake as you go (here’s a video that shows you what I mean).

Toblerone Cake

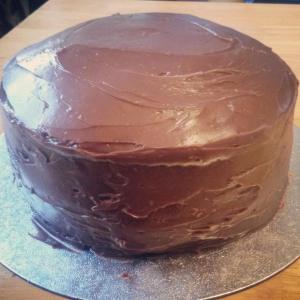
Vanilla sponge smothered in rich Toblerone chocolate ganache

Decorate the cake as you wish – I always enjoy a bit of sparkle (and edible glitter doesn’t require fancy piping skills)! Add a candle. Make somebody’s birthday even more special. Serve.

A slice of Toblerone Birthday Cake

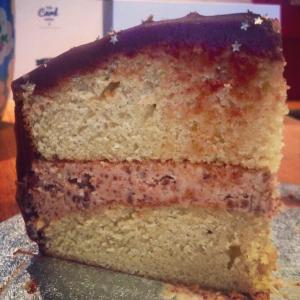
A slice of Toblerone Birthday Cake, generously filled with Toblerone buttercream and covered with Toblerone ganache

If you like using well-loved chocolate bars in baking, check out this pavlova recipe.

Chocolate Clementine Cake

Chocolate Clementine Cake

Chocolate Clementine Cake; it’s practically health food!

I can’t take all the credit for this cake as it’s adapted from a Nigella Lawson recipe for clementine cake. I made this version for my cousin’s birthday; she’s a nutritionist and the fact this cake is wheat-free, gluten-free, dairy-free and free from added fat means you could almost convince yourself it’s healthy! As it’s made with ground almonds it stays wonderfully moist, and with the addition of cocoa it’s almost truffle-like – serve with a little cream and you’ve got yourself an excellent dessert.

Chocolate Clementine Cake

Ingredients:

375g clementines (probably 4-6 clementines depending on size)
230g ground almonds
240g caster sugar
40g cocoa, sifted
6 eggs
1 tsp baking powder

Firstly, don’t worry if your clementines are a little more or less than 375g, just don’t go cutting a bit off to make the right weight, they should be whole for the first stage. Boil the clementines for 2 hours, topping up the water as necessary to make sure they don’t boil dry. After the two hours are up, remove from the pan and allow to cool before cutting in half to remove any pips and any stalk.

Heat the oven to 190C and grease and line an 8″/21cm springform tin. If you have a food processor, chuck in all the clementines (skin  and everything) and whizz them up into a fairly smooth pulp. If you don’t have a food processor then blend or very finely chop and the fruit, trying not to lose any of the liquid, then tip it all into a large bowl. Add the rest of ingredients to the food processor or bowl and mix well. Pour the batter into the prepared cake tin and bake for about an hour, covering the top with foil after about 40 minutes to avoid burning. The top will crack, don’t worry. The cake is done when it springs back when pressed and a skewer comes out clean. Remove from the oven and allow to cool completely whilst still in its tin on a wire rack.

Spiced Plum Cake

Spiced Plum Cake

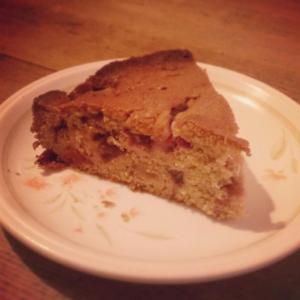
Spiced Plum Cake – moist and loaded with seasonal fruit

I bought lots of plums at the supermarket today, thinking I’d make a crumble at the weekend. I probably still will (and the recipe will probably end up here!), but I just couldn’t stop myself making a cake this evening. Everything I bake at the moment seems to be spiced – clearly the time of year for warming flavours – whilst the seasonal plums help this cake stay deliciously moist and soft.

Spiced Plum Cake

Ingredients:

  • 125g butter, softened
  • 50g caster sugar
  • 75g soft dark brown sugar
  • 2 eggs
  • 175g self raising flour
  • half tsp baking powder
  • half tsp cinnamon
  • half tsp mixed spice
  • 5 plums

Heat the oven to 170C and grease and line an 8″ spring form cake tin with greaseproof paper. In a large bowl, cream together the butter and sugars until light and fluffy. Beat in the eggs, then add the remaining dry ingredients (if you have a stand mixer, you can make this as an all-in-one cake and just mix the whole lot together, scraping down the sides with a spatula half way through to ensure everything is well incorporated). Chop the plums into small chunks, discarding the stones, and stir through the stiff cake batter with a spatula. Scrape into the prepared cake tin and bake for 45-55 minutes. The cake is done when it’s a deep, golden brown, firm to the touch and coming away from the edges of the pan. Remove from the oven and cool on a wire rack. Dust with a little icing sugar to serve.

Pumpkin Spiced Coffee Cake

Pumpkin Spiced Coffee Cake

Pumpkin Spiced Coffee Cake. Better than that there coffee giant’s latte.

Every year, around this time, I see friends on Facebook and Twitter getting all hyped up because a certain high-street coffee chain brings back their Pumpkin Spice Latte. I’ve not actually tried one myself, but I’m intrigued by the flavour combination and as I had a tin of pumpkin puree knocking about in the cupboard, so I decided to have a go at creating a cake with the same key ingredients. It didn’t taste like I expected, but I really enjoyed it – it’s lovely and moist with a surprisingly light texture. As this makes two cakes, you could either freeze one (well wrapped in greaseproof paper and then clingfilm) or make up some cream cheese buttercream and sandwich the two cakes together. Or I guess you could make half as much. I only made this much because I used the whole tin of pumpkin.

Pumpkin Spiced Coffee Cake

Ingredients:

  • 425g (1 tin) pureed pumpkin
  • 225g vegetable/sunflower oil
  • 150g yoghurt
  • 2 eggs
  • 500g light brown soft sugar
  • 450g plain flour
  • 4 tbsp espresso powder
  • 2 tsp bicarbonate of soda
  • 1 tsp salt
  • 2 tsp cinnamon
  • 1.5 tsp nutmeg (freshly grated if possible)
  • 1 tsp mixed spice

Heat oven to 180C and grease and line two 9″ round cake tins (spring form, if you have them). In a large bowl, beat together the wet ingredients – pumpkin, oil, yoghurt and eggs – and the sugar until smooth and well incorporated. Add all the dry ingredients and mix to form a pourable batter. Divide the mixture between the two tins and bake for around 45 minutes; the cakes are done when they’re a rich brown colour, risen and firm to the touch. Remove from the oven and cool in their tins on a wire rack for 15-20 minutes before carefully taking them out of the tin to cool completely. Dust with a little icing sugar, cut a big wedge and serve with your favourite brew.

Lemon and Lime Tray Bake

Lemon and Lime Tray Bake

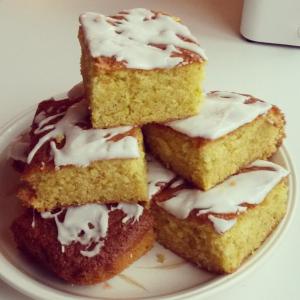
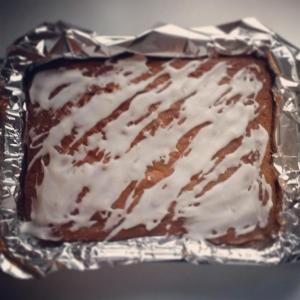
Lemon and Lime Tray Bake, fragrant with the zest of citrus

This week was the final of Great British Bake Off. I bloody love that programme (not exactly alone in that, eh?) and often watch with another addicted friend. We watched this last episode together so I baked us something (it’s safer that way!) to keep us satisfied whilst watching all the spectacular goodies on-screen. I had been undecided as to what I should bake, but in the end, time constraints and an abundance of citrus fruit in my kitchen lead me to knock up a nifty little all-in-one tray bake – with the added bonus of getting to use my Kenwood Chef which is my favourite new toy!

Lemon and Lime Tray Bake

For the cake:

  • 250g butter
  • 250g caster sugar
  • 4 eggs
  • 250g self raising flour
  • 2 tsp baking powder
  • 1 tsp bicarbonate of soda
  • zest 2 lemons
  • zest 2 limes and juice of one
  • 2 tbsp whole milk

Heat the oven to 180C and line a tin (approx 25x20cm) with foil. If using a food processor or stand mixer, put all the ingredients in the bowl and mix, starting off slowly and increasing speed until well mixed. If making with an electric hand whisk or by hand, cream the butter and sugar, then beat in 2 of the eggs followed by half the dry ingredients, then the remaining eggs and dry ingredients, finishing with the zests, juice and milk. Pour the mixture into the prepared tin and bake for about 30-40 minutes until golden brown and firm to the touch, springing back when lightly pressed with your fingertip. Remove from the oven and leave to cool before icing.

For the icing:

  • 100g icing sugar, sifted
  • juice of half a lime

Mix together and then drizzle artfully (or not) over the cooled cake. Cut cake into portions. Eat.

Lemon & Lime Tray Bake

Artistic decoration optional!

Apple and Raisin Loaf Cake

Apple and Raisin Loaf Cake

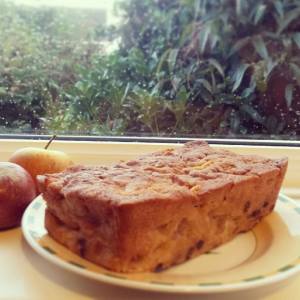
Apple and Raisin Loaf Cake, perfect for a rainy autumn day

I was over at my parent’s place this weekend because I was looking after all the sick people there. Mostly this just involved feeding people, something I rather enjoy. I knocked up this simple little cake because there were lots of apples to be eaten or used, and a slice of comforting apple cake on an autumnal day is surely good medicine even if you’re not feeling poorly.

Apple and Raisin Loaf Cake

Ingredients:

  • 125g butter, softened
  • 125g caster sugar
  • 2 eggs
  • 125g self raising flour
  • half tsp baking powder
  • 1 tsp cinnamon
  • 2 eating apples (I used Pink Lady), cored and chopped into small chunks
  • generous handful raisins

Heat the oven to 170C and grease and line a loaf tin with greaseproof paper. In a large bowl, cream together the butter and sugar until light and fluffy. Add one egg and beat, then add about half the flour and mix to incorporate, then mix in the second egg followed by the remaining flour, baking powder and cinnamon (if you’re a big cinnamon fan, I’d say chuck in an extra half teaspoon). Mix well, then stir in the apple chunks and raisins. Pour the batter into the prepared tin and bake for about an hour. It’s done when golden and it springs back when pressed with a fingertip. Remove from the oven and leave to cool in the tin for about half an hour before turning out to cool completely on a wire rack.

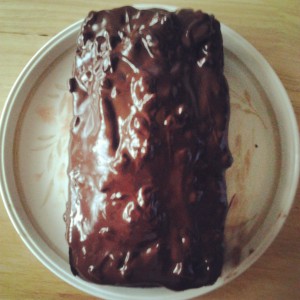
Chocolate and Ginger Loaf Cake

Chocolate and Ginger Loaf Cake

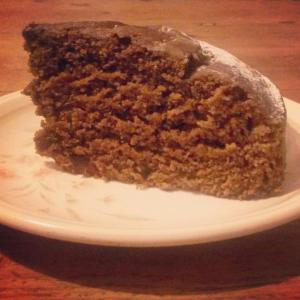
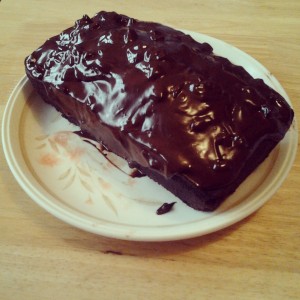
Sweet and warmly spiced, Chocolate and Ginger Loaf Cake

After a few days of not baking whilst packing, moving and unpacking, I’m back at it. Almost the first thing I did in my new place was bake some bread because it made me feel at home. Need to get used to a different oven – I think this one is a little cooler than my old one so I may invest in an oven thermometer.

After baking a couple of loaves of awesome bread, I decided to further ingratiate myself with my new landlord/housemate by making cake! You can’t go far wrong with chocolate cake, and he’s a big lover of ginger so I combined the two and came up with this rather delicious tea-time number. It’s surprisingly light and you could easily leave off the chocolate topping if you wanted. But who doesn’t want more chocolate?!

Chocolate and Ginger Loaf Cake

For the cake:

  • 150g butter, softened
  • 175g soft dark brown sugar
  • 2 tbsp golden syrup
  • 150g plain flour
  • 25g cocoa, sifted
  • half tsp baking powder
  • 2 eggs
  • 20g fresh ginger, peeled and finely grated
  • 60g ginger beer

Heat your oven to 170C and grease and line a loaf tin with greaseproof paper. In a large bowl, cream together the butter, sugar and syrup until fluffy and much paler in colour. Combine the flour, cocoa and baking powder in a separate bowl. Add a bit of these dry ingredients to your butter and sugar mixture and beat in, then beat in one egg followed by a bit more dry ingredients, then the second egg and the last of the dry ingredients. Stir in the ginger and ginger beer (don’t worry if it looks a bit sloppy or like it’s almost curdled) then pour into the prepared loaf tin and bake for 45-50 minutes. It’s done when firm to the touch – if you test with a skewer it’s absolutely fine (a good thing, in fact) if there is still just a hint of gunge left on it. Leave to cool in the tin and then transfer to a wire rack to cool completely.

For the chocolate topping:

  • 100g dark chocolate
  • 50g milk chocolate
  • 50g butter
  • 3 tsp crystallised ginger, finely chopped

Melt the chocolate in a bowl over a pan of barely simmering water, being careful that no water or steam gets in the bowl as this will make your chocolate go grainy. Once melted add the butter and stir until melted and combined with the chocolate. Stir in the crystallised ginger until well dispersed. Remove the bowl from the heat and allow to cool for a little while; you want it to be thickly pourable.

Place your cake on a serving plate and pour the chocolate topping over, ensuring it covers right to the edges and hopefully drips alluringly down the sides. Leave to set for as long as you can bear before cutting into slices to serve.

Chocolate and Ginger Cake

Chocolate and Ginger Loaf Cake

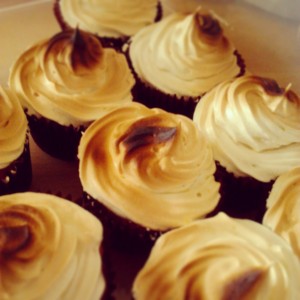
Lemon Meringue Cupcakes

Lemon Meringue Cupcakes

Lemon Meringue Cupcakes – a lovely cakey version of the classic dessert

I wouldn’t normally post two cupcake recipes back-to-back, but as it’s been National Cupcake Week I asked people on my Facebook page to tell me what their favourite flavour of cupcake is. I got some great responses but the one that really sparked my imagination was lemon meringue flavour. I already had some egg whites in the freezer, left over from making my Apple Pie with Orange Pastry so I decided to give these a go and try making Italian Meringue for the first time. I’m really pleased with how these turned out, and although making the meringue does mean you need a food thermometer, it was actually much easier than I thought.

Lemon Meringue Cupcakes

For the cupcakes:

  • 125g butter, softened
  • 125g caster sugar
  • 2 large eggs
  • 125g self-raising flour
  • half tsp baking powder
  • 1 tsp vanilla extract
  • 2 lemons
  • 1 tbsp milk

Heat the oven to 170C and line a muffin pan with paper cases. In a large bowl, cream together the butter and sugar until light and fluffy, then add the eggs and beat again until well combined. Add the flour and baking powder and give it a good mix, then add the finely grated zest of both lemons and juice of just one, plus the vanilla and milk; mix it all together and then use a couple of spoons (or an ice cream scoop for perfectly portioned cupcakes) to dollop the mix into the cases until about two thirds full (I got 10 well-filled cupcakes from this amount, but you could certainly make a dozen, slightly smaller ones). Bake for about 20 minutes – they’re done when they’re golden, spring back when lightly pressed with a fingertip or a skewer inserted comes out clean. Remove from the oven and take them out of the tray as soon as possible to prevent the cupcake cases peeling away as they cool.

For the filling/meringue topping:

  • about 4 tbsp lemon curd
  • 2 egg whites at room temperature
  • 125g caster sugar
  • 35/40ml water

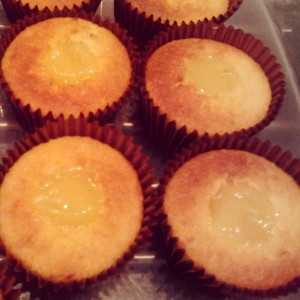
Once the cupcake are cooled, make little holes in the centre to about half way down the cake; this can be easily done with a teaspoon and doesn’t need to be neat and tidy, but you can buy things called cupcake corers from baking shops if you feel so inclined! Set to one side.

Lemon Meringue Cupcakes – pre-meringue

Naked Lemon Meringue Cupcakes, filled with lemon curd and awaiting their meringue topping

To make the Italian meringue (a meringue made with hot sugar syrup so that it doesn’t need baking), whisk the egg whites in a large (scrupulously clean) bowl until they form soft peaks. Put the sugar and water in a saucepan and bring to the boil until it reaches 121C. Now quickly pour the sugar syrup into the egg whites in a thin stream, whisking all the time. Continue to whisk the meringue until it becomes quite cool – this will take a little time. Once cooled, you can either pipe the meringue onto the cake with a piping bag, or mound it on with a palatte knife and then make little peaks with it. If you’re a fancy pants, you may have a little blow torch that I should think you can brown the meringue with, being careful not to set light to the paper cases. If you’re not in the habit of buying all kinds of kitchen gadgetry, just whack your grill on to a high heat and put the cupcakes under the grill for a few minutes until the meringue looks toasted. Whatever you do, don’t wander off! It only takes a few minutes from start to finish, but the difference between lightly browned and burned takes a few seconds so keep and eye on them at all times. Let them cool completely again before serving. A lovely little cakey version of a classic dessert.

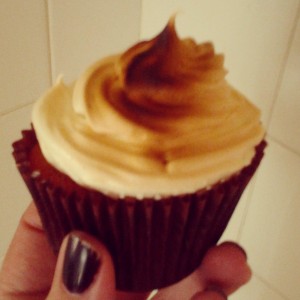
Lemon Meringue Cupcake

Lemon Meringue Cupcakes – light, sweet and tangy

These are best the day they’re made, purely because them meringue becomes less stable after a while. You could always make the cupcakes a day ahead and finish them off with the meringue the day you need them.