Pimped-Up Cheese Straws

Pimped-Up Cheese and Bacon Straws - perfect served warm with a frosty drink

Pimped-Up Cheese Straws

I love a cheese straw. These are dead easy – you could make them with just pastry, cheese and an egg – but with a few simple additions (obviously leave out the ham if you want them vegetarian) they’re extra tasty.

Not the most exact recipe – measurements are all going to depend how big your pastry is rolled out and how finely you grate your cheese. My top tip is to grate the cheese finely as you use less and actually get more flavour.


Pimped-up Cheese Straws


Ingredients:


  • 1 pack ready rolled puff pastry, chilled
  • Flour for dusting
  • 2-3 tsp of mustard – your favourite type
  • About 8 tbsp grated cheese – I used a mix of parmesan and strong cheddar
  • 2 tbsp finely chopped fresh rosemary
  • 1 pack (about 6 slices) Parma ham or similar
  • 1 egg

Pre heat the oven to 220C and get a couple of baking sheets ready. Flour a clean, dry surface and spread out the chilled pastry. Roll it out a little thinner – you should have a fairly large rectangle. With the longest side of the rectangle closest to you, smear the mustard in a thin layer over half the sheet of pastry, like a page of a book. Sprinkle about two thirds of the cheese over the mustard, followed by most of the rosemary – keep about a teaspoon back. Lay the Parma ham over the cheese, covering as much of the area as possible, then sprinkle the rest of the cheese on top of the ham.


Fold the uncovered half of the pastry over the top, like you’re closing a book. Press the outer edges together to seal it a bit, then use the rolling pin to flatten it all out a bit more and squidge it all together. You should still have a rectangle shape, so with the longest side towards you again, use a very sharp knife to cut from top to bottom in strips about an inch wide. Give each strip a couple of twists and place on your baking sheets, leaving some room between each one as they’ll puff up when cooked. Beat up the egg and brush each twist, then sprinkle with the remaining chopped rosemary (and any cheese crumbs left over). Bake for 10-15 minutes – they’re done when golden and delicious smelling (check the underside also looks cooked). These are at their best still warm.

Happy blog birthday to me!

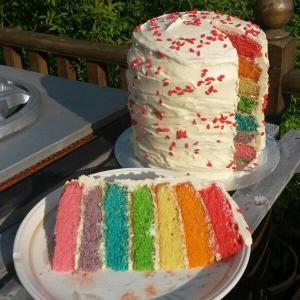
Rainbow cake to celebrate my blog's first birthday

Rainbow Cake

Not a recipe this one. Just a bit of a thank you, really. I’ve been writing this blog for a year now, and it makes me really happy. As much as anything it’s a great way for me to keep my recipes, but I do enjoy sharing my baking and this way I get to share it with all of you who read it.

Along the way, even before I started, there’ve been some people who’ve been super supportive and encouraging. I want to say a little thank you to a few. They’re all lovely folk, and you could do worse than follow them (on Twitter) or check out their blogs.

Firstly, The Ginger Bread Lad, one of my favourite baking bloggers, who was always so nice about my baking on Twitter and suggested I give blogging a go. Definitely one to watch, this one – I expect big things from him in the future. Have a look at his recipes here.

Then there’s Alice. Lovely Alice. Encouraging me to blog doesn’t really cover it. Nagged. Pestered. Bullied. Even came round my house and helped me get it working properly and gave me a 101 in WordPress. If you’re lucky enough to know Alice (and if you live in Brighton, I’d be surprised if you don’t, networking queen that she is), then her generosity of spirit knows no bounds. She’s also a good excuse for me to come up with more gluten-free baking. Check out her Gluten-Free Dining Guide.

The delightful Arusha Elworthy lent her magnificent skills by creating my logo. I particularly love my little pink-haired, leopard-aproned baker (me in cartoon form, even though my hair is no longer pink). Thank you for making me look so adorable!

My most unusual recipe to date has to be my Gluten-Free Bacon and Peanut Butter Brownies, created for the Pork Princess herself, Nicole ‘Snafflepuss’ Healing. She was even kind enough to re-blog my recipe on her blog, where you can find plenty of good stuff to read about all sorts of things. She’s also a marvellous yoga buddy.

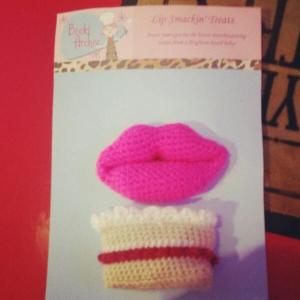
Speaking of buddies, Hannah is my good Bake Club buddy. And she’s a dab hand with the old crochet hook, crafty mare, and made me the most amazing birthday present of some beautiful pink lips and a cake, which I proudly wear daily and get lots of compliments on. That’s them in the picture below. See how clever she is?! Oh, and she guest-blogged some tasty little biscuits.

Beautiful crochet brooches, handmade for my birthday by Hannah.

Birthday lips and cake

Endless encouragement and offers of help come from my favourite glamour-nerd on the street, Amy Blackburn. I’ve known and loved her long time, and I’m inspired and delighted by her success setting up her own business. If you like geeky, comic book stuff and super cute clothes then Geek La Chic is the place for you.

A few friends in Twitter-land, who I hope one day to meet for real, also deserve mentions for all their retweets, confidence boosting and even trying out my recipes. Thank you Faye, Dodie, Mike, Jacquie (perhaps better known as Bite Me Brighton) and Julie – you’re all awesome and deserve a huge slice of cake.

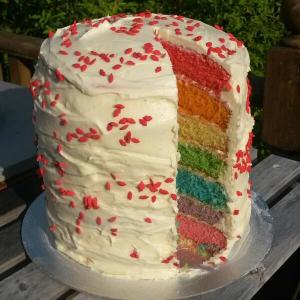
Whilst there’s no recipe this time, I did make myself a big old blog birthday cake. I would have blogged it, but honestly, though it looks pretty good in the picture there were a few disasters with this along the way. You’re bound to find a decent recipe for rainbow cake online, and I know that Holiday Baker Man is kindly willing to share his expertise if you are brave enough to give one of these mammoth cakes a go. Still, for all its issues, it didn’t half look impressive when I cut a slice!

There are plenty more people I probably should have thanked (ooh it’s all gone a bit awards ceremony speech), but I don’t want to run the risk of boring anyone so much they never come back to look at my recipes. So to all of you who’ve ever read my little blog – thank you!

Seven layers of colourful cake

Rainbow birthday cake


Peanut Butter Salted Caramel Millionaire’s Shortbread

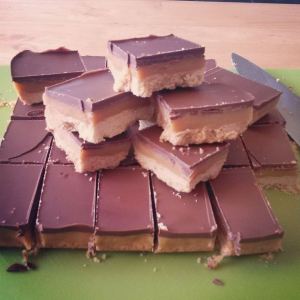
Peanut Butter Salted Caramel Millionaire's Shortbread

Peanut Butter Salted Caramel Millionaire’s Shortbread, a pimped up version of a classic.

My friend Tora and I have been making salted caramel millionaire’s shortbread for years – both of us are obsessed with salted caramel. But then I thought, there’s not many things in life that aren’t improved by a little peanut butter. So I did this. And it was good.

You can easily omit the salt from the caramel if you want as the peanut butter will most likely be a bit salty anyway. But if you are using it, always add your salt last and in tiny amounts, tasting as you go. You can always add more, but you can’t take it away if you add too much!

This is pretty rich, so I definitely suggest cutting it into small portions.

Peanut Butter Salted Caramel Millionaire’s Shortbread

For the peanut butter shortbread:

  • 150g unsalted butter, softened
  • 30g smooth peanut butter
  • 1 tsp vanilla extract
  • 75g caster sugar
  • 225g plain flour

Heat the oven to 180C and grease and line a tin (approximately 25x20cm) with greaseproof paper. In a large bowl, cream together the butter, peanut butter, vanilla and sugar. You can use an electric whisk for this but if your butter is nice and soft then it won’t take much work with a wooden spoon. Once well mixed, add the flour and rub it in with your finger tips until it’s the consistency of bread crumbs. Tip the mixture into your lined tin and squash and press it down and into the edges of the pan until you have an even layer – use your knuckles or the bag of a large spoon. Prick it all over with a fork and put it in the oven. Bake at 180C for 5 minutes, then turn down to 150C and bake for a further 30-35 minutes until evenly golden brown. Remove from the oven and cool a little before you’re ready to apply the caramel.

For the peanut butter salted caramel:

  • 200g unsalted butter
  • 397g condensed milk (that’s the standard size in the UK. It wont matter if it’s a few grams more or less)
  • 4 tbsp golden syrup
  • 2 tbsp smooth peanut butter
  • up to 1 tsp sea salt

You can make the caramel whilst the shortbread is in the oven. In a medium sized heavy bottomed saucepan, melt the butter over a medium heat. Once the butter is melted add the condensed milk and golden syrup and continue to heat, stirring all the time with a wooden spoon. Seriously, don’t be tempted to leave this and do something else – the high sugar content means that it can easily catch and burn – I’ve made that mistake in the past and it’s frustrating and a waste when you have to chuck a batch of burnt caramel away, not to mention the mess it makes of the pan. Cook for about 10-15 minutes, hot enough to boil but not vigorously, and be careful as you don’t want to get splashed with it as it’s super hot. The caramel is ready when it’s, well, caramel coloured. Remove from the heat and stir in the peanut butter. Before adding any salt, taste a little bit (blow on it first and be very careful not to burn your tongue). Add the salt a pinch at a time, tasting after each addition. Once you’re happy with it, pour it over the cooked and slightly cooled shortbread. Spread it out with a spatula until it’s reached the edges and you have an even layer. Leave it to cool, or even put it in the fridge to set up a bit before you add the final layer of chocolate.

For the chocolate:

  • 200g milk chocolate
  • 100g dark chocolate

(To be honest, it won’t matter if you just use milk chocolate, but I prefer a mix of milk and dark) Melt the chocolate, either in a bowl over a pan of simmering water, or in short, 20 second bursts in the microwave, stirring in between zaps.

Once melted, pour over the shortbread and spread it to the edges. Give it a shake and a sharp rap on the kitchen counter to get a nice even finish. Leave to set in the fridge for at least a couple of hours. Remove from the pan, peel off the greaseproof paper and use a big sharp knife to cut into portions (I got 32 pieces out of this). This should keep well for 3-5 days in an airtight container, but I doubt it’ll last that long once anybody tries it!

If you’re as big a fan of salted caramel as I am, check out my other recipes here. Or if it’s peanut butter that floats your boat, have a peek at these.

Brilliant Mini Creme Egg Brownies

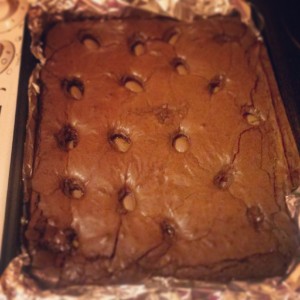
Choc full of chocolate and Cadbury's mini Crème Eggs, my brilliant brownies.

Choc full of chocolate and Cadbury’s mini Crème Eggs, my brilliant brownies.

I know it’s not that long ago I posted a brownie recipe, but these are an awesome Easter treat so with a week to go until the day when it’s socially acceptable to eat chocolate for breakfast, I thought I’d share. You could easily leave out the mini Creme Eggs when they disappear from our shelves for another year – the brownie itself is spectacular, with most people I’ve given them to agreeing they’re the best they’ve tried.

Brilliant Mini Creme Egg Brownies

Ingredients:

  • 200g butter
  • 200g dark chocolate, broken or chopped into chunks
  • half tsp salt (UNLESS you’re using salted butter, in which case none at all)
  • 4 eggs
  • 200g caster sugar
  • 150g soft brown sugar
  • 100g plain flour
  • 50g cocoa, sifted
  • half tsp baking powder
  • 200g Cadbury’s mini Creme Eggs

Heat the oven to 180C and line a tin approx 25x20cm with tin foil or baking paper. In a saucepan over a low heat, melt the butter until just liquid (you’re not aiming to colour the butter at all. Remove from the heat and stir through the chocolate until melted and combined with the butter.

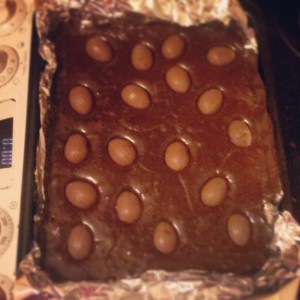
In a large bowl.  or bowl of your stand mixer if you have one, whisk together the eggs and sugars until increased in volume and a sort of creamy brown colour. Fold in the flour and sugar, making sure you don’t leave any pockets of dry ingredients unmixed. Then pour and scrape in the chocolate and butter mixture and fold this through until you’ve achieved an even colour. Pour into your prepared tin, then stud with the mini Creme Eggs, pushing them in just a little. Bake in the oven for 25 minutes.

MORE CHOCOLATE! Make your brownies even more indulgent with the addition of Cadbury's mini Crème Eggs!

MORE CHOCOLATE! Make your brownies even more indulgent with the addition of Cadbury’s mini Crème Eggs!

The brownie will form a crust that will probably begin to crack, but you can’t test if they’re done the way you do with a cake as the whole point of a good brownie is to be moist, sticky and sodden inside, so don’t be tempted to bake them longer. Remove from the oven and cool completely before cutting into pieces. A small piece of this rich, gooey brownie should be enough to keep any chocoholic in a state of bliss!

Rich and gooey in the middle, studded with sweet surprises of Cadbury mini Crème Eggs

Rich and gooey in the middle, studded with sweet surprises of Cadbury mini Crème Eggs

For more brownie recipes click here. Or change things up a little and check out my blondies.


Chocolate Almond Meringues

Chocolate Almond Meringues

Chocolate Almond Meringues

I’ve not blogged for a while, but it’s not for lack of baking, just lots of other things going on that have kept me from the keyboard. Hopefully I’ll be able to get lots of recipes added in a short space of time to make up for it.

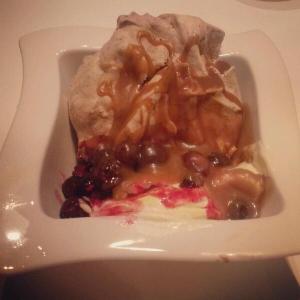
To kick things off, here are some lovely meringues I made when I was cooking dinner for friends recently. I served them with good vanilla ice cream, warm mixed berries (just a bag of frozen ones from the supermarket, heated through with a couple of tablespoons of sugar), salted caramel sauce and chocolate hazelnut sauce. Meringues are great for entertaining as you can make them several days in advance and (once cooled) store them in an air tight container or tin.

Chocolate Almond Meringues

Ingredients:

  • 4 egg whites
  • 200g caster sugar
  • 2 tbsp cocoa powder, sifted
  • 30g dark chocolate, finely grated
  • 1 tsp cornflour
  • 1 tsp vinegar (I used cider vinegar, but white wine or sherry vinegar would be fine)
  • 100g flaked almonds, toasted

Heat the oven to 180C and line two baking trays with greaseproof paper (when the meringue is made, used little blobs of it to secure the paper to the baking trays). Using a stand mixer or electric hand whisk, whisk the egg whites until you get to the stiff peak stage. Still whisking, add the sugar a tablespoon at a time, allowing the sugar to get completely incorporated before adding more. Continue to whisk until all the sugar is mixed in and the meringue is white and glossy.

Add the cocoa and dark chocolate, folding in with either a rubber spatula or large metal spoon. DO NOT use a wooden spoon or other blunt kitchen tool as you’ll lose too much of the air you’ve spent so long adding. You can be quite swift and firm when folding in, but make sure you don’t leave any pockets of dry ingredient unmixed. Sprinkle over the cornflour, vinegar and toasted almonds and fold these through. Dollop mounds on the prepared baking sheets, leaving a little space between as they will spread and settle a little.

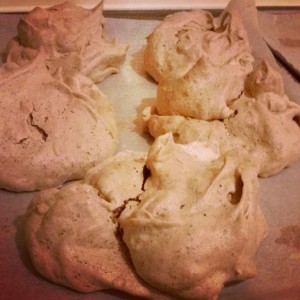
Pillowy mounds of glossy meringue

Pillowy mounds of glossy meringue

Place the meringues in the oven and turn the temperature down immediately to 150C. Bake for 45-50 minutes. The meringues will be crisp on the outside, possibly even a little cracked, with a chewy, marshmallowy middle. Remove from the oven and allow to cool and use the same day, or you can store them in an airtight (and completely dry) container for 3 or 4 days.

Crisp outer shell with a chewy, marshmallowy centre

Crisp outer shell with a chewy, marshmallowy centre

To make an easy chocolate sauce, heat 300ml double cream to just below boiling, break in 150g milk chocolate (or a mix of milk and plain) and stir until melted. Add a tiny pinch of salt and, if you have it, a tablespoon or two of liqueur (I used hazelnut, but orange, mint, brandy or Baileys would all be perfect). Allow to cool to room temperature. Pour over almost anything for instant deliciousness!

If you want to make your own salted caramel sauce, I swear by Nigella Lawson’s recipe and you can find it here. And if you want more meringue goodness, take a look at my other recipes.

Rich Raspberry and White Chocolate Brownies

Rich Raspberry and White Chocolate Brownies

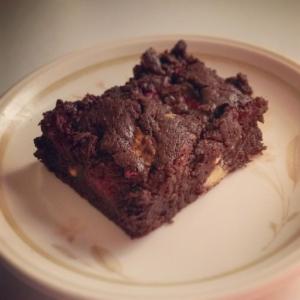
Brownies, filled with love (well, raspberries and chocolate)!

I’m not a fan of Valentine’s Day, but I’m not really traditionally romantic. I don’t like flowers all that much, I don’t particularly like having stuff bought for me and the idea of being ‘spoiled’ is something I can’t get my head round – after all, something that’s spoiled is a bad thing, right? The most ‘romantic’ things that have ever been done for me, gestures filled with emotion at a time when I really needed to feel loved and cherished in some way, have all been done for me by friends. I don’t think you should need a special day to show somebody that you love them, or if you do want to show somebody how much they mean to you I don’t think that person needs to be a romantic partner. I mostly show people how much they mean to me with food – cooking their favourite meal, baking something using their favourite ingredient or making dinners they can chuck in their freezer  to use when their time is needed for something more important than cooking. If you did want to show somebody how much you care, I think these brownies are a pretty good place to start.

Rich Raspberry and White Chocolate Brownies

Ingredients:

  • 250g butter
  • 200g dark chocolate, finely chopped
  • 200g caster sugar
  • 160g soft brown sugar
  • 65g plain flour
  • 80g cocoa powder, sifted
  • 1 tsp baking powder
  • 4 eggs
  • 150g raspberries
  • 100g white chocolate, chopped into chunks

Heat your oven to 180C and line a tin (approx 25x20cm) with foil (leave it hanging out of the tin a bit as you’ll be able to use it to lift the brownie out once cooled). In a medium sized saucepan, gently melt the butter until liquid but not browned. Turn off the heat and add the chopped dark chocolate, stirring until melted. Add the sugars and continue to stir until well combined. Next add the flour, sifted cocoa and baking powder and mix well so that no patches of dry ingredients remain. Crack the eggs into a mug or bowl and lightly beat them before pouring into the chocolate mix and giving the whole thing a big stir so it’s all well combined and glossy.

Pour the brownie mixture into the prepared tin and spread it out evenly so it’s right in the corners. Scatter the raspberries over the surface, followed by the white chocolate chunks. Use a teaspoon to sort of nudge the raspberries and chocolate into the brownie mix so that they’re nestled and smothered into the raw brownie mix. I suppose you could just add the fruit and chocolate to the brownie mix before you pour it into the tin, but by doing it this way you should avoid everything just sinking to the bottom as it cooks. Bake in the oven for 25-35 minutes – the brownies are done when the top is set and firm but a skewer inserted still has a little gunge clinging to it – brownies should always have a bit of goo to them even when cooled, and the abundance of fruit in these helps them stay incredibly moist. Remove from the oven and allow to cool completely in the tin, before lifting out and cutting into squares. OR you could serve them, still a little warm, with some pouring cream or ice cream as a lush dessert to end a special meal.

For a very different kind of brownie recipe click here. Or perhaps white chocolate in my blondies might tickle your fancy.

Totally Chocolaty Birthday Cake

Totally Chocolaty Birthday Cake

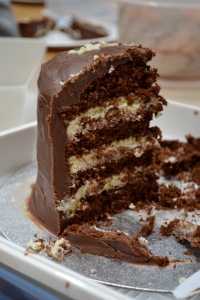
Four layers of chocolate sponge, sandwiched with white chocolate buttercream and smothered in chocolate ganache

Judging by how many birthday cakes I’ve been asked to make in the last few weeks, spring really does get everyone’s sap rising! Anyway, the lovely Natasha Bailie (parental types should check out her blog, the milkstand) asked me to make a cake in honour of her baby boy’s first birthday. The babies attending Max’s birthday party will be having something a little kinder to young tummies and teeth, but the grown ups are getting the big-fat-birthday-cake experience with this totally chocolaty bad boy.

The instructions for making the ganache are given last as covering the cake with this divine mixture is the last stage of the cake. However, as the ganache needs to cool before using, it’s actually a good idea to make it first, or around the same time as you make the sponge.

Totally Chocolaty Birthday Cake

For the cake:

  • 225g butter, softened
  • 225g caster sugar
  • 4 eggs
  • 50g cocoa, sifted
  • 175g self raising flour
  • half tsp baking powder
  • 2 tsp vanilla extract
  • 1 tbsp golden syrup
  • 1 – 2 tbsp milk

Heat the oven to 175C and grease and line 2 8″ cake tins with greaseproof paper. In a large bowl, cream together the butter and sugar until light and fluffy. Beat in two of the eggs until well mixed and smooth. Add the cocoa and a bit of the flour and mix again, scraping down the sides of the bowl to make sure everything is being well incorporated. Beat in the third and fourth egg, then the remaining flour and baking powder, then the vanilla and syrup, and finally slowly add the milk, mixing until you get a soft batter that drops easily off a spoon. Divide the mixture as evenly as possible between the two prepared tins, flattening it out with a spatula. Bake for 25 – 30 minutes – the cake is done when the middle springs back when lightly pressed with your finger, a skewer comes out clean and it’s beginning to come away from the sides of the tin. Remove from the oven and cool on a wire rack. Once completely cool, remove the greaseproof paper and cut in half with a large, serrated (bread) knife. You now have your four layers ready for filling and covering!

For the white chocolate buttercream:

  • 200g butter, softened
  • 400g icing sugar, sifted
  • 1 tsp vanilla extract
  • 200g white chocolate

If you have a free standing mixer or electric hand whisk, I’d suggest using it for this.

In a large bowl, beat together the butter, sugar and vanilla (start slowly to try and avoid covering your kitchen in icing sugar). Beat for longer than you think you need to – this way you’ll get a lovely soft, lightly whipped textured buttercream. Melt the white chocolate (either in a bowl set over a pan of simmering water, or very carefully in a microwave in bursts of 20 seconds, stirring in between). Allow the chocolate to cool a little before adding to the buttercream and give it a really good beating to make sure it’s well mixed.

Place one of your layers of cake on a cake board or whatever serving plate you’re planning on using. Dollop about a third of the buttercream on and use a palatte knife to spread it out to the edges in an even layer. Add another layer of cake, taking a little time to make sure it’s on straight and pressing down lightly to secure it. Repeat the process with the buttercream and cake layers until you have all four layers of cake sandwiched together with three generous layers of buttercream.

For the chocolate ganache:

  • 300ml double cream
  • 500g milk chocolate, chopped
  • 1 tsp vanilla extract
  • small pinch salt

Warm the cream in a medium sized saucepan until just under boiling point, a few small bubbles at the edge of the pan are fine. Turn off the heat. Add the chopped chocolate and stir into the cream with a spatula until completely smooth and no lumps of chocolate remain. Add the vanilla and a very small amount of salt (sea salt for preference over table salt) and mix well. Allow to cool completely, stirring occasionally. The mixture will become thick, but spreadable.

Dollop most of the mixture on the top of the cake, then use a spatula or large palatte knife to smooth it out to the edges and down over the sides (this video will show you how far better than I can explain it!). If you want a really shiny finish, dip your metal palatte knife in hot water, dry it on paper towel and use the hot knife to smooth the surface of the ganache.  Decorate however you wish – I melted a little white chocolate and piped the birthday boy’s name and age, but be as creative and flamboyant as you feel befits whoever the cake is for!

Max's Chocolate Birthday Cake

Chocolate makes the perfect birthday cake, whatever age!


I have plenty of cake recipes that would all make wonderful birthday cake, click here to check them out.

Fully Loaded Favourite Cookies

Fully Loaded Favourite Cookies

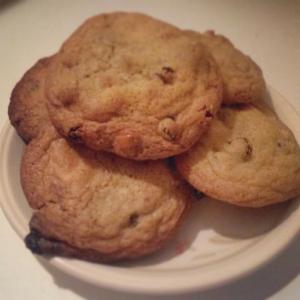
Cookies, stuffed full of raisins, milk and white chocolate and toasted hazelnuts

Inspiration for new bakes can come from all kinds of places, but I never thought the One Show (don’t judge me, my landlord watches it) would lead me to bake such a cracking cookie. They did one of their scintillating features on biscuits – the science of dunking, the nation’s favourite biscuit – all that need-to-know stuff. Anyway, they made some biscuits with the nation’s favourite ingredients – chocolate, raisins and hazelnuts – and apparently they were really rather good. So I decided I’d have a bash at something like it myself and here’s the result.

The hazelnuts keep the cookies from being overly sweet, what with all the chocolate and raisins in there. If you can’t get hold of toasted hazelnuts, put them on a baking tray in a hot oven for about 5 minutes. You can then get the papery skins off quite easily by rubbing them with a clean tea towel or some kitchen paper, but it doesn’t matter too much if you don’t remove the skins.

Fully Loaded Favourite Cookies

Ingredients:

  • 120g butter, softened
  • 100g soft, light brown sugar
  • 60g caster sugar
  • 1 egg
  • 1 tsp vanilla extract
  • 190g plain flour
  • half tsp bicarbonate of soda
  • small pinch salt
  • 50g raisins
  • 50g milk chocolate (drops, or chopped into smallish chunks)
  • 50g white chocolate (drops or chopped)
  • 50 toasted hazelnuts, chopped a little

Heat the oven to 190C. In a bowl, or in a freestanding mixer, cream together the butter and sugars until fluffy and light. Add the egg and vanilla and beat well until well incorporated.  Add the flour, bicarb and salt and give another good beating so that you have a thick, sticky cookie dough with no lumps of flour. Chuck in the raisins, both types of chocolate and the nuts and give a good stir so that everything is well distributed in the dough.

You’ll need a couple of baking trays. Use your fingers to pinch off a lump of dough and roll roughly into a ball shape, about the size of a gold ball. Place the balls on the baking sheet, well apart as they will spread as they cook. I only got 4 to a baking sheet – you can always cook them in batches. Bake in the oven for 10-15 minutes. They’re done when golden, but should still be soft to the touch as they’ll firm up as they cool and it’s better to under-bake a cookie so you get that soft, chewy middle. Leave to cool on the tray for a few minutes before transferring to a wire rack to cool (eat one while they’re warm – lush!).

I made 8 cookies with just over half the dough. Cookie dough freezes brilliantly, so just put any that you don’t use in a freezer bag, sling it in the freezer and then the next time you want a quick batch of cookies take the bag out and leave it on the kitchen counter – it’ll be ready to use in about 30-40 minutes!

For more of my cookie and biscuit recipes, take a look here.

Toblerone Birthday Cake

Toblerone Birthday Cake

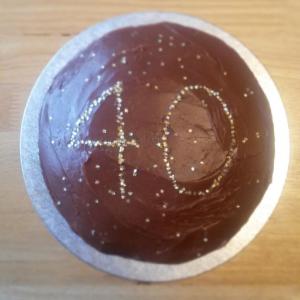
Toblerone Birthday Cake for a surprise party

I was asked to make a birthday cake this week, and given the brief “a nice sponge or chocolate cake, with 40 iced on top”. I’m no great artist with a piping bag so I asked what the birthday boy’s favourite sweets are, thinking I might be able to make a 40 out of them; it turned out Toblerone is his favourite, which inspired me to make this cheeky little number. I opted for a vanilla sponge as I felt chocolate sponge, buttercream and ganache may have been excessively rich; by all means if you want to go for a totally chocolate experience then you could use this cake recipe in place of the vanilla sponge.

Toblerone Cake

For the cake:

  • 225g butter, softened
  • 225g caster sugar
  • 2 tsp vanilla extract
  • 4 eggs
  • 225g self raising flour
  • 2 tsp baking powder
  • 2 tbsp milk

Heat the oven to 175C and grease and line two 8″ cake tins with greaseproof paper. In a large bowl, cream together the butter and sugar until light and fluffy. Add the vanilla and two of the eggs and beat again until well combined. Add about half the flour and mix. Follow with the remaining two eggs, mixing again, then the last of the flour and baking powder mixing until everything is well combined and smooth, scraping down the sides of the bowl if necessary. Lastly add mix in the milk so the cake batter is a soft, dropping consistency. Divide the mixture as evenly as possible between the two cake tins, smoothing into the edges with a spatula or back of a spoon. Bake in the oven for 20-25 minutes. The cakes are done when golden, a skewer inserted comes out clean, or they spring back when lightly pressed with a finger tip. Remove from the oven and leave to cool on a wire rack.

For the Toblerone ganache:

  • 300g Toblerone (or similar, non-branded chocolate bar)
  • 75g milk chocolate
  • 300ml double cream
  • small pinch salt

Chop the Toblerone and other chocolate into small pieces. Heat the cream over a medium heat in a smallish saucepan. Once the cream is just under the boil (beginning to bubble very slightly at the edges) turn the heat off and add the all the chopped chocolate and the small pinch of salt, stirring until melted and the mixture is smooth. You’ll see little white flecks, which are the nougat, but if you occasionally stir it as the mixture cools these will melt too. Leave to cool completely (this will take a few hours).

For the Toblerone buttercream:

  • 125g butter, softened
  • 250g icing sugar, sifted
  • 1tsp vanilla extract
  • 100g Toblerone

If you have a food processor, use this to whizz up the Toblerone so it’s small crumbs; otherwise, chop as finely as possible.

In a bowl, cream together the butter and icing sugar – if you’ve got an electric hand whisk or stand mixer use it for this – beat the mixture for longer than you think you need to and you’ll get a lovely, fluffy soft buttercream. Add the vanilla and chopped Toblerone and give it all a really good mix.

To assemble the cake, place the flattest cake on a serving plate or cake board. Smother with the buttercream, using a spatula or palette knife to get it as evenly spread and as flat as possible. Place the top layer of sponge on and gently but firmly press down to secure it in place. Use a spatula to dollop the ganache on top of the cake. Use a palette knife to push the ganache to the edges of the cake then smooth it down over the sides, turning the cake as you go (here’s a video that shows you what I mean).

Toblerone Cake

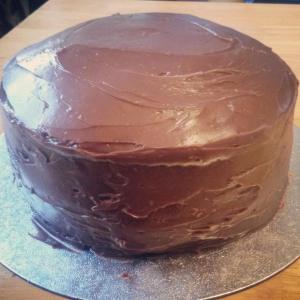
Vanilla sponge smothered in rich Toblerone chocolate ganache

Decorate the cake as you wish – I always enjoy a bit of sparkle (and edible glitter doesn’t require fancy piping skills)! Add a candle. Make somebody’s birthday even more special. Serve.

A slice of Toblerone Birthday Cake

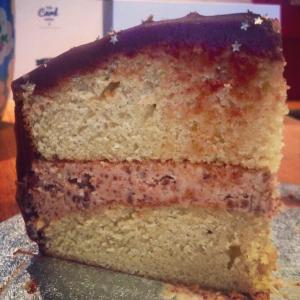
A slice of Toblerone Birthday Cake, generously filled with Toblerone buttercream and covered with Toblerone ganache

If you like using well-loved chocolate bars in baking, check out this pavlova recipe.

Lemon Curd and Raspberry Roulade

Lemon Curd and Raspberry Roulade

Lemon Curd and Raspberry Roulade; light, luscious, sweet and sharp

My best friend loves lemon, particularly lemon curd. For our pre-Christmas get-together I decided to make a dessert with some lemon curd; something a bit sharp and zingy to liven up the taste buds when all around is super-stodgy, rich and spicy. I decided on roulade as, though it’s filled with cream, the sweet meringue is light and fluffy inside and the perfect foil to the tart lemon and raspberries. I was incredibly pleased with how this turned out – it’s easily as good as any luxury dessert you’d get at a supermarket – it’d be a brilliant centrepiece pud for a New Year’s celebration.

If you wanted, you could use ready made lemon curd, but make sure it’s the best quality you can afford, made with real lemons, eggs and butter and not full of additives and setting agents. However, making the curd is actually quite simple, gives you a great sense of satisfaction, and there’s plenty left over for toast (or give it as a gift in a pretty jar).

Lemon Curd and Raspberry Roulade

For the lemon curd: (I followed a Nigel Slater recipe)

  • 4 lemons, preferably unwaxed
  • 200g sugar
  • 100g butter
  • 3 eggs and 1 yolk (save the spare white for your meringue)

In a heat proof bowl, over a pan of simmering water (don’t let the bowl touch the water) combine the finely grated zest and juice of the lemons with the sugar and butter, stirring until everything has melted.

Give the eggs and extra yolk a little whisk to mix, then add to the lemon mixture. Mix with a wooden spoon or whisk frequently until the mixture thickens. It’ll feel heavier and be the consistency of custard. Remove from the heat and allow to cool for several hours or overnight (if you’re planning on giving some as gifts then put it in sterilised jam jars at this stage, whilst it’s still hot –  you’ll get a couple of small jars worth with enough left over to make the roulade)

For the meringue:

  • 4 egg whites
  • 200g caster sugar
  • 1 tsp corn flour
  • 1 tsp cider/white wine vinegar
  • a little icing sugar for dusting

Heat the oven to 150C and grease and line a Swiss roll tin or high sided baking sheet (approx 23 x 33cm) with greaseproof paper. Now, to make your meringue it’s really important your bowl is scrupulously clean – if possible use a glass or metal bowl and wipe round the inside with the cut side of half a lemon or a paper towel with a little vinegar on; this should get rid of any grease. Put your egg whites in the bowl and whisk until you get to the stiff peaks stage. Add the sugar a spoonful at a time, whisking all the while. Sprinkle over the corn flour and vinegar and give one last short whisk until everything is combined and glossy. Spoon the mixture onto the prepared tin, smoothing into the corners with a spatula and trying to get a flat, even surface. Bake for 30–35 minutes until the surface of the meringue is just firm. Remove from the oven, let it cool for about ten minutes. Lay a sheet of greaseproof on a board and dust with icing sugar. Once the meringue has cooled a little turn it out onto the board and carefully remove the greaseproof from the base and leave to cool while you assemble the filling.

For the filling:

  • Approx 200ml lemon curd
  • 300ml double cream
  • 1 tbsp icing sugar, sifted
  • 150g raspberries

In a large bowl, whip the cream with the icing sugar until thick – it should cling to the whisk but drop off easily if the whisk is tapped on the side of the bowl. It’s easy to over-whisk cream if you do it with an electric whisk or stand mixer so keep a close eye on it if you use a machine. It doesn’t take long to do with a balloon whisk and a few minutes whisking shouldn’t be too much work for most people. Once it’s the desired consistency, add six tablespoons of the lemon curd and mix well.

Use a spatula to smooth the cream mixture over the cooled meringue, trying to make an even layer and leaving a border of about 1 cm around the edge. Slather with the remaining lemon curd and then scatter with the raspberries. Now for the roll!

Before the big roll! Lemon Curd and Raspberry Roulade

Before the big roll! Lemon Curd and Raspberry Roulade

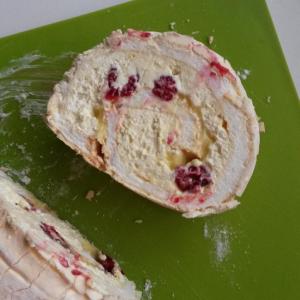
With the shortest end of the meringue facing you, roll it away, folding over and using the greaseproof paper to try and keep the roll compact. Once it’s fully rolled, place on a serving plate with the fold underneath. Chill in the fridge for a couple of hours before serving as this will help it firm up before you slice into it. It looks beautiful when cut, with swirls of snowy white interspersed with sunny yellow curd and ruby red raspberries. Luscious!

If you love a roulade, take a look at another recipe here, or if lemon meringue pushes all the right buttons how about some blondies or cupcakes?